Nothing beats the ambiance of natural light on images. When correctly navigated, natural light creates soft portraits with great skin tones. A great natural light will also create a perfect balance between highlights and shadows. While shooting indoors using natural light exclusively may seem limiting, natural light offers a wide range of lighting styles you can work with to shoot great quality images.
Before shooting indoors, it is extremely important to conduct a pre-visit to the shoot location. This will allow you to have a feel of the best time to shoot, the direction of the site towards the sun, the sunrise and sunset time and how the light changes on different times of the day and to make accurate specifications to Outsource work to the company providing photo retouching services. You will also be able to assess the number of windows, their position in relation to the sun and how much light they let in. A pre-visit will also help you understand changes in the light which directly affects it’s color and thus the white balance(WB) of your image. These are factors that will be absolutely important during your shoot. Here are a few pointers that you will need to keep in mind to create great indoor images while optimizing on natural light.
Position your subject appropriately in relation to the source of light.
The window is your ultimate best friend when it comes to shooting indoors. Windows are often the best source of natural light for indoor shoots. Where and how you place your subject in relation to your window(s) will have dramatic differences to your image(s).The angle in which light falls on your subject dictates the general feel or rather the mood of the image. If your subject poses facing the window while you photograph from a front facing angle, light evenly falls across their face which will soften their features. On the contrary, if they face against the light, their features will appear more prominent. It is also important to note that the closer you get to your window, the more the light that you can use and work with. On a general note, North and South Facing windows will have great light all day.
The size of the window will also affect your image. A large bright window will aid to create a much softer image while a smaller one will be effective in creating a more directional and dramatic look. There are three ways you could position your subject in relation to the window to create different effects on your images.
Front lit
Here, the subject directly faces the window. The photographer is between the window and the subject. This lighting position is known to produce the most even light.
Side lit
In this lighting position, the subject is placed at a slight angle or parallel to the window. This position often yields images that have deeper contrast especially if the shoot is during the midday with the sun streaming in through the window.
Backlit
The subject has their back to the window while they face the photographer. This is a perfect lighting position for great indoor silhouettes.
Turn off artificial lights
When shooting indoors, it is important to ensure that your only source of light is natural light. This will mean turning off any other sources of light in your space. Mixing both natural and artificial light will affect the color of light and make skin tones appear odd. Electric lights will also affect the white balance of an image. Overhead lighting will also cast unflattering shadows that exaggerate eye bags and wrinkles. If it is absolutely necessary to use some overhead light, have your subject step back a little from it so that the light bounces from the floor to your subject instead.
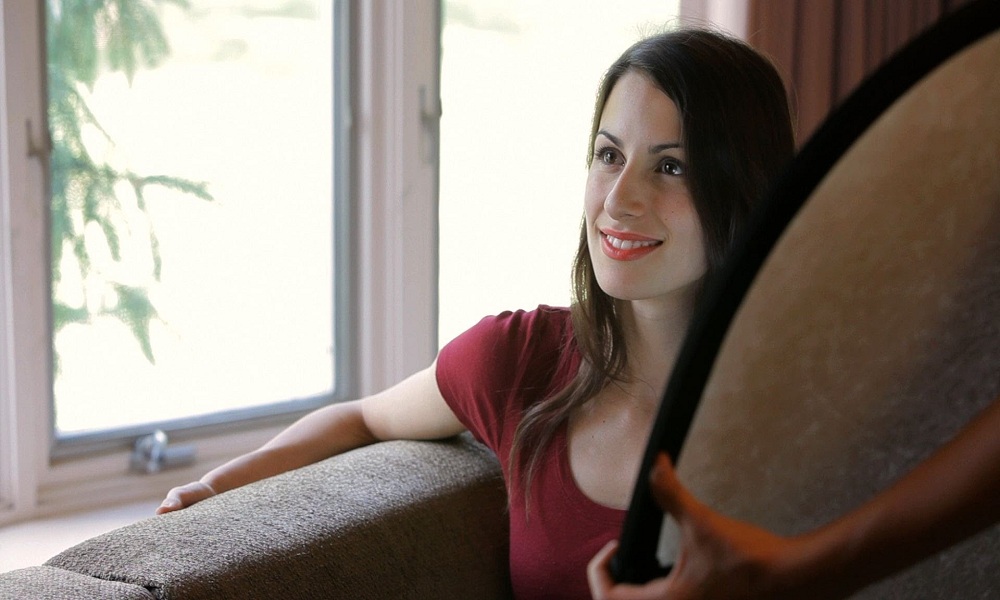
Use a reflector and diffuser
One of the tools that will be an absolutely necessary for great indoor photography is a reflector. A reflector will ensure that just the right amount of light bounces back to your images which will dramatically improve their quality. This is especially for backlit and sidelight images. If you do not have access to a readymade reflector, you can use a blank whiteboard or paper and have your assistant reflect it onto your subject. A diffuser is another great tool for indoor photography. A diffuser will soften window light especially if the shoot happens during the harsh midday sun. If you do not have access to a diffuser, a white curtain or blind will give off the same effect.
Set your camera to best settings fit for Indoor Photography
To capture great indoor images it is necessary that you understand your camera and the best settings to use for the shoot. Automatic setting is limiting but could be necessary if you are capturing an event that you might not reshoot again. Manual setting is however preferable as it enables you to play around with settings to manifest different feels on your images. It is advisable that you set your Camera to Aperture Priority Mode which enables you to adjust your aperture. With indoor photography using natural light, you will need to let in as much light as you possibly can.This means you will need to widen your aperture by lowering your aperture number(f-stop).The manual setting will allow you to do that. A wide aperture also results in a shallow depth of field. A shallow depth of field means that your subject remains sharply in focus while the background is left a little blurry and soft. This effect adds a beautiful and warm feel to your images especially if you are shooting portraits.
Read- How to shoot white products photos effectively by not losing its detail
When it comes to ISO, start with a lower number and a faster shutter speed slowly adjusting until the image is properly exposed. If the shutter speed is so slow that movement is picked up on the exposure, increase your ISO. Play around with the three elements Shutter speed, aperture, and ISO until you have the perfect shot. You can Take help from a Professional Photo editor to make images more attractive.